Download and Installation
- Find the download link on the homepage, download the zip file to your operating system.
- After extracting, run the ClashN.exe program.
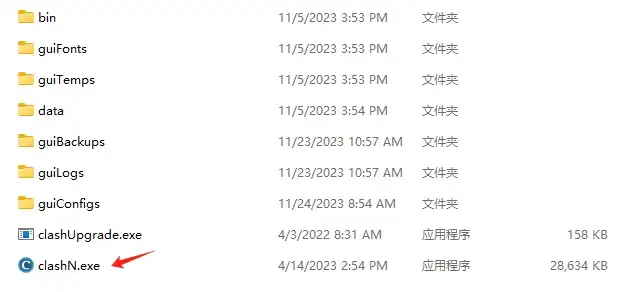
PS: The client needs a proxy subscription to achieve scientific internet access. If you haven’t purchased a proxy service yet, you can refer to our recommended providers.
Configuring Subscriptions
Open Clash N and select the “Profiles” feature from the left menu.
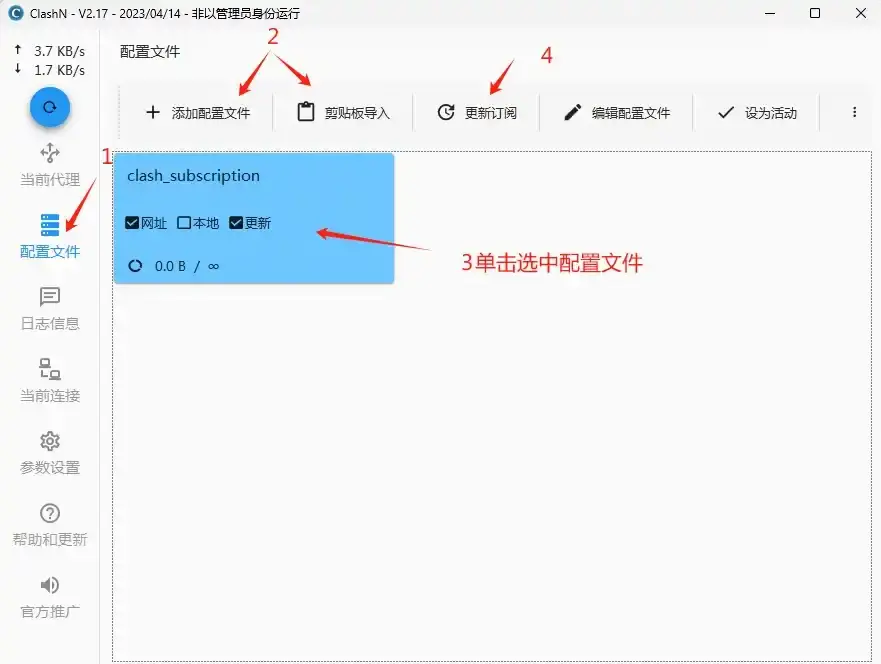
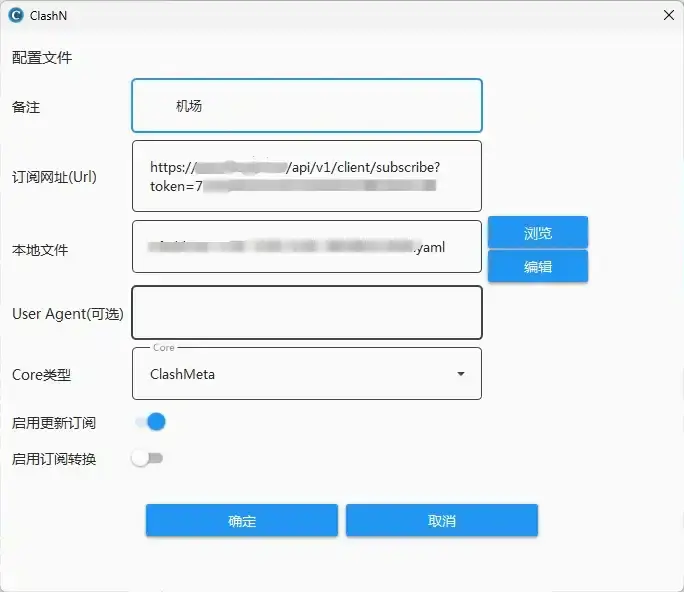
Click “Add Profile”, enter the subscription URL, and for “Core Type”, you can choose the powerful Clash Meta.
If the subscription uses a V2Ray subscription address, you can click “Enable Subscription Conversion”.
If you haven’t purchased a subscription service yet, you can refer to our recommended proxy services.
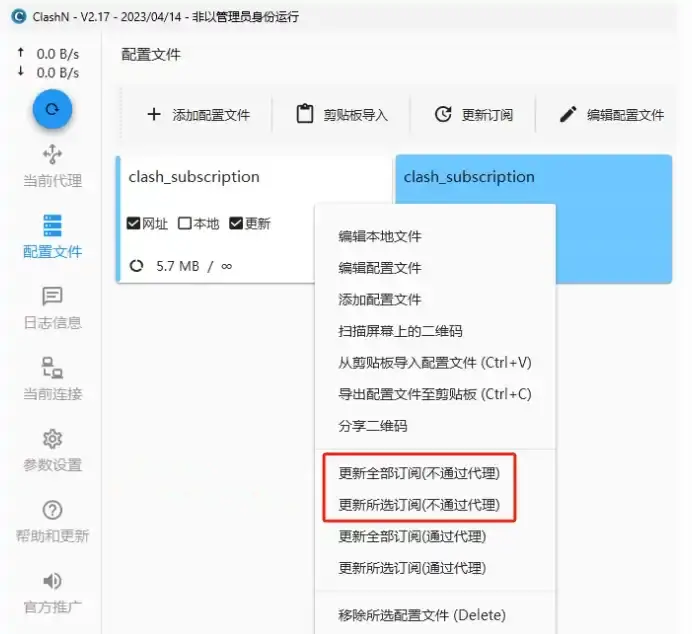
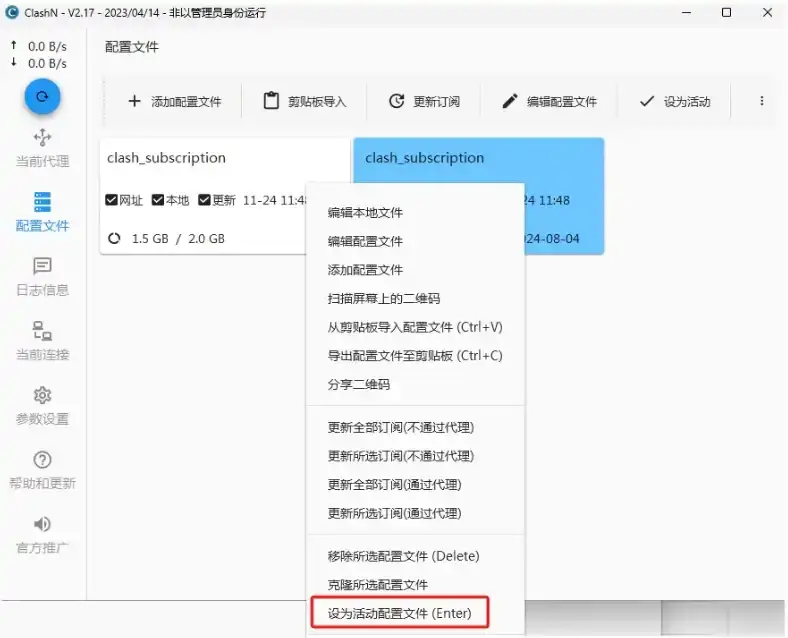
After adding, right-click on the subscription and select “Update All/Selected Subscriptions” from the menu to retrieve proxy node information.
Then, right-click on the added subscription and choose “Set as Active Profile” to use the node servers in the subscription.
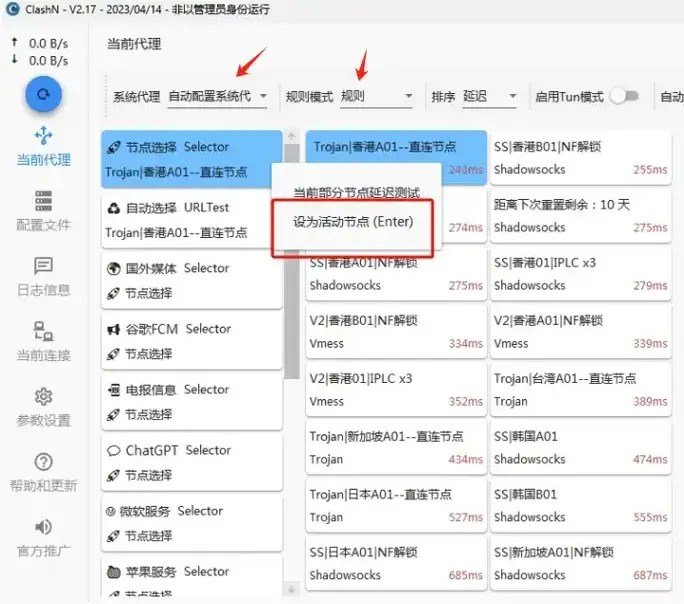
Select “Current Proxies” from the left menu, then in the right-side proxy nodes, choose the required server, right-click and select “Set as Active Node” to start using it.
- It’s recommended to set the system settings to “Automatically Configure System Proxy”. This way, network traffic will go through Clash N.
- For Rule Mode, it’s advised to choose “Rules”. This way, only websites and services that need to bypass censorship will go through the proxy.
Testing Connection
- Use a browser to visit a website that is usually not accessible, like Google, to test if the proxy is working properly.
- If there are issues, try redownloading the configuration file or adjusting the proxy mode.
Advanced Features
- If you are an advanced user, you can try enabling TUN mode for more complex network routing functionalities.
